Sunday, January 30, 2011

Sunday Chores!


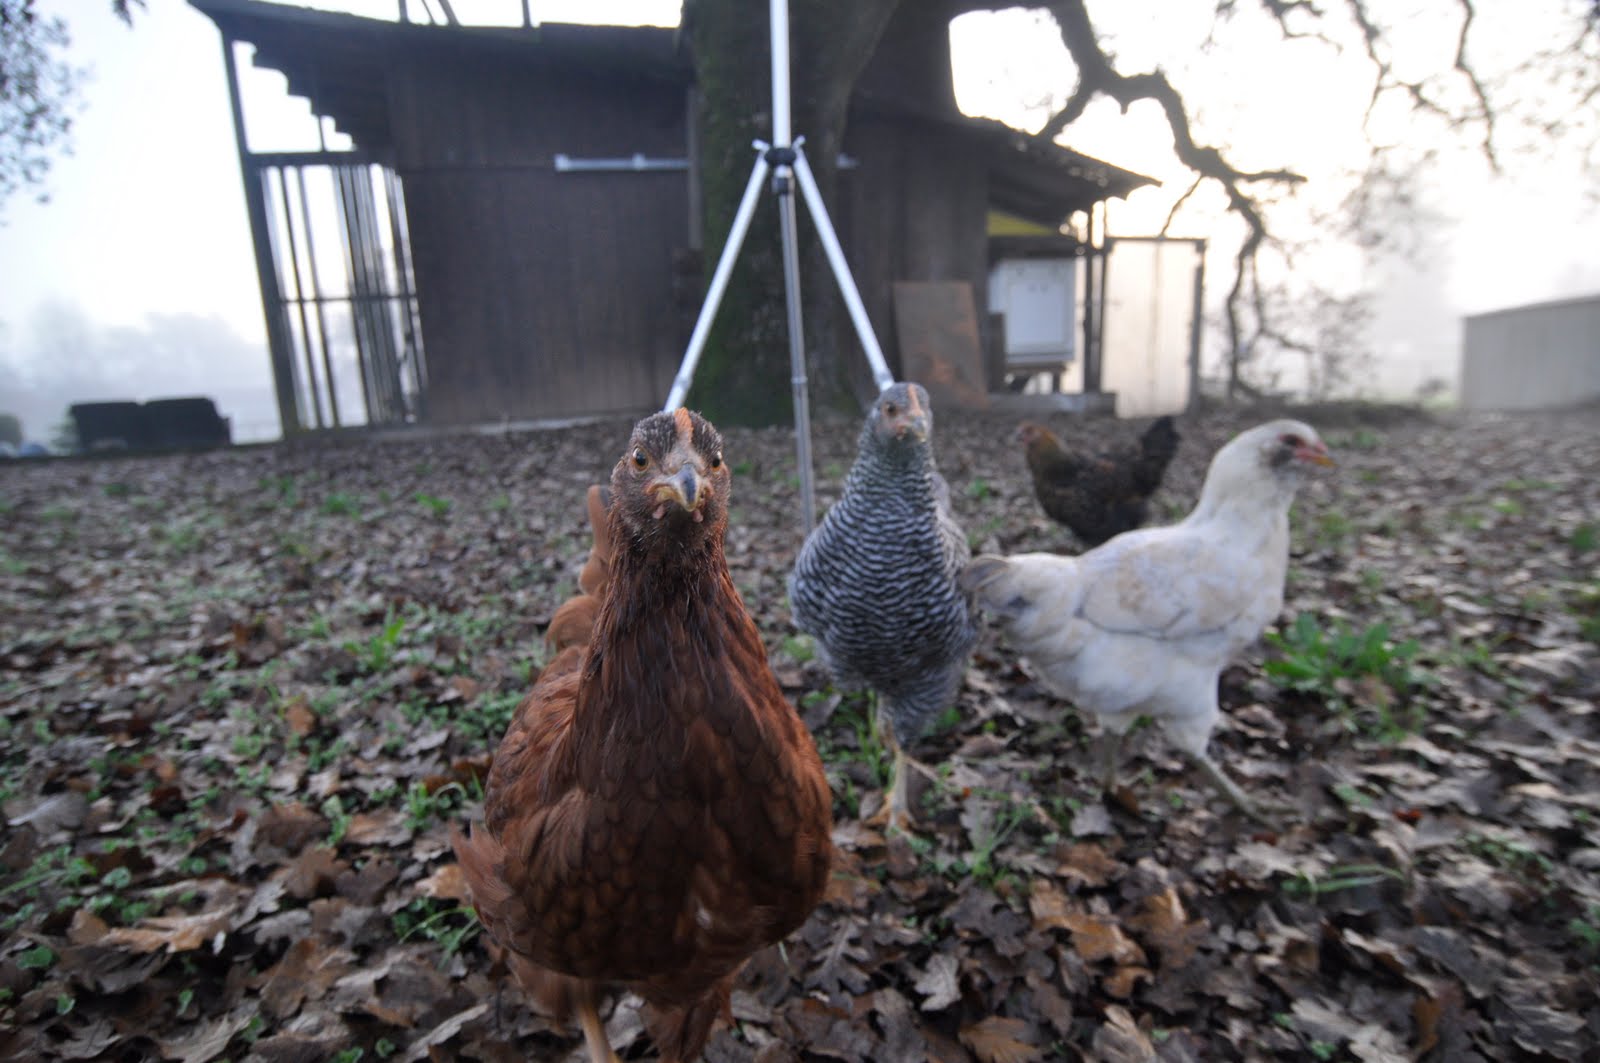
This morning we woke up and made a quick decision to get things done around the property. Jackie started with a little bit of QT with the flock.

Whachoo lookin' at!?

Then a quick harvest in the garden.

Our broccoli, just hanging around.

In our previous post, we had a picture of our now very holy (not Holy) spinach. We ripped it out, put beer traps in the bed and put copper tape around the edges of the bed. We spent about what we would have spent on slug bait for the copper tape but this is hopefully a more permanent fix and we don't have to worry about poisoning anything or anybody.
You can see the beer trap in the corner. It should be called a 'Strange Brew Trap'.


"Me and my brother always used to dream of drowning in beer, and now I'm here and he's not and this sucks!'
Bob McKinzie- Strange Brew.
Moving on!

Thursday, January 27, 2011

Flying the coop!

Just playing around with Imovie

Rooster Update!

If you will recall, we had a saying when we aquired our brood of chickens:
If it lays , it stays
If it crows it's got to go.

Well...
We have a crower! This handsome young rooster is not that prolific at waking us up early in the am, but he is getting better at it.

What fate awaits the black and white 'Barred Rock' with the hackle fit for dry fly tying and the Pavarotti sized lungs? (He's more like a Backstreet Boy at this point but he's just getting the hang of it.) We shall see...


This is Samwise. He hasn't crowed yet. There is still a chance that it's a she but I won't hold my breath.


Garden Update!

So,

I bet you were wondering what was happening with our broccoli. It turns out that it is preparing to help fight cancer!

http://www.scientificamerican.com/podcast/episode.cfm?id=broccoli-fights-cancer-by-clearing-11-01-27

Broccoli Fights Cancer By Clearing Bad Tumor Suppressors

Cruciferous vegetables contain compounds that preferentially destroy ineffective mutant p53 tumor suppressor proteins, but leave the good ones alone. Steve Mirsky reports.


Steve Mirsky would be proud!


This is what a full grown broccoli flower looks like. We netted our two main garden boxes to keep the chickens out.


Unfortunately netting out slugs is a little tougher.

There is a rumor out there that chickens are good for your garden.
There is a fact that chickens enjoy fresh veggie scraps from the kitchen.
I would like to propose that chickens all though not the brightest animals have sense enough associate food growing in the garden with well... food.

Exibit A:

Lounging in the garlic patch.

They like to dust bathe in the soil as well.

Chickens turn the soil, create loads (loads!) of fertilizer and eat a ton of bugs. Some wineries turn chickens loose in their vines to do all of this. Grape vines are tall enough that chickens can't get to the vital bits. But for home gardens, keep the chickens out!

Garlic crop, not doing so well.

This combined with a very nicely stated complaint by a neighbor that our chickens will not be welcome in his yard much longer (very understandable) has lead us to the decision that we are going to corral the poultry! Oh well, full time free range isn't going to work but part time is going to be better then nothing.

Tuesday, December 21, 2010

Updated chicken pictures! And then there were six!

Howard the rooster is currently residing in Novato in another chicken fans coop (see previous post). Itchy remains with us because at the last minute we were informed that he may still be hen and that we should wait it out. He is definitely a rooster at this point but we'll keep him around until he starts getting to aggressive or wears out his welcome in other ways. Having two roosters for a free ranging chicken flock could be a good thing. We shall wait and see.

Our remaining chickens seem to be doing really well. We, like all of California have had a lot of rain over the last week. The chickens take shelter in the barn and under bushes when rain gets heavy, but for the most part they still patrol the property eating bugs and weeds and Howard's (human Howard's) broccoli plants.

We have been leaving their heat lamp on for about 4 hours after dusk to help them warm up and dry out. The chickens seem to be pretty unaffected by the weather.


This is Sam coming out of the coop. We'll do a post on the coop in a bit.


The gang trying to gain entry!

Lucy front and center.

Itchy and Racer 5 getting curious.


Samwise. Photogenic little beast.


Saturday, December 18, 2010

Building a beautiful dining room table in a pretty nice spot.

My good friend JJ has a shop up in McCloud CA. It is near Mt Shasta and actually has a great view of the mountain from the garage.
Mc. Cloud used to be a lumber town and now, as far as I can tell the only lumber facility that is there is Terramai. They sell all reclaimed wood from around the world. Beautiful stuff. I would recommend poking around on their website.

When the mills shut down in Mc Cloud JJ's family had the wherewithal to purchase some of the un-milled wood for future use in his restaurants or in homes or whatever. A lot of the wood is being used in E.J. Phairs brewery in Pittsburgh Ca. Or at least it will be in the near future.


Anyways,

The view from the shop.


Not so bad.

We planed and ripped, all of the floor board looking boards that you see in these pictures to be used as the floorboards in JJ's brewery's tasting room. They are currently seasoning Pittsburgh CA.


Bella, relaxing on the deck.


So we picked out some old floor boards from the mill that were the approximate size of the table we wanted to build and planed one side of the wood and ripped the outside edges. With all of the warpage and the sheer age of the wood, it was a bit like a puzzle putting these boards together so they were flat(ish).

We used a picture form 'The Wooden Duck' as a guide for building the table. Also for motivation to build our own (look at those prices!).


With the tongue and groove already installed from a previous life we just glued the boards together using Titebond Glue. It is the same glue I use on my guitars and it works great! We used tie-down straps to clamp the table together (see picture of the leg assembly). Especially working with something that is this big (and not having clamps that would fit) the tie downs worked perfectly. We then used clamps to flatten the table top out on some strait strong boards and let it sit overnight.

Then: we found the appropriate lumber for the legs and cut it to size and planed both sides. We used 4x4's for the legs and 2x6 for the cross member.

The piece of wood that the leg assembly is sitting on is what the wood looks like un-planed. It is a piece that was eventually used as the table top.


This is the legs almost done. You can see the lag bolts that are holding the legs and cross members together. We used glue and biscuits to hold the frame together.

Check out the table we are assembling the undercarriage on. it is a big steel table with a perfect 90 degree corner and holes for clamping pneumatic clamps. We did not have an air compressor to use the clamps but that table was great!


We used "L" brackets to screw the table top to the leg assembly. Then we sanded the table top down to remove the ridges and...


Here is the table! All together now.
"Here is the table".
See all of the imperfections and quirks! That is what makes it mine!
Next stop, Windsor and finishing (about 2months later)!


Saturday, December 11, 2010

Project Hopyard: Growing Fresh, Organic Hops In Sonoma County


We have had a ton of rain lately in Sonoma County. With a break in the rain today, I set my intentions to complete what has been a project consuming my mind for months: Hops!

For those of you who don't know what hops are, here is one of my favorite websites dedicated to hops: http://www.freshops.com/. It's the little sumpin-sumpin that makes your favorite beers taste and smell great.

Apparently getting fresh, organic hops is not as common as one would think. Especially given that we are living in a mecca of all things local, organic and fresh. Thus, I have resolved to grow my very own, and have all winter to think about which varieties to grow.

I am leaning toward a few varieties of aromatic hops, and no bittering hops, since the aromatics are the ones most delicate and usable in fresh form. However, I have at least 3 months to research this issue and will likely be limited by what varieties the local folks will let me buy.

My first request for a dwarf hop variety was soundly rejected by the local brew supply shop (http://www.thebeveragepeople.com/), so I will either need to find other less-local sources, or submit to stringing a cable 14ft high. I have plans and materials for doing this, but could plant a LOT more hops around the yard if I can find a supplier of dwarves. (Any of you local folks have dwarf rhizomes? If so, let me know!)


Ok - so about our hopyard!


After two sessions of digging, cutting materials, moving compost, and piling all of the ingredients on top of one another, lasagne-style, the hopyard has been prepared is finally ready to stew and make great organic hop soil.


If you look closely at the photo on the left, you can see the cardboard, chicken wire, straw and compost.


Here are some fairly thorough details for how I did ours, in case any of you out there are curious.

Ingredients:
- chicken wire (keeps the gophers out of your precious roots)
- cardboard (keeps weeds out)
- compost. We used our own household compost/worm pit, plus an organic batch we got from Sonoma Compost Company (http://www.sonomacompost.com/).
- weed barrier
- leaves, hay or yard clippings
- optional: crushed oyster shells

After selecting a cool spot for the hopyard (see view from the hopyard below!), we got to work.

Instructions:
Step 1: dig holes about 3 feet apart in a line.
Step 2: cut and place chicken wire into each hole.
Step 3: cut and place cardboard in each hole.
Step 4: sprinkle oyster shells if you have them. This is optional and I only added the oyster shells to Plants 13-22.
Step 5: toss in your compost, layer each type.
Step 6: throw some yard clippings in.
Step 7: another layer of compost mixed with dirt. You should by now have a nice little mound that is about 6-12 inches above the ground. See photo below.

Step 8: place the weed barrier over each mound.

Step 9: dump a large pile of leaves over each mound.

The photo above shows the three types of garden clipping piles I used. From the right: hay, leaves from the apple tree, and leaves from the oak tree. I secretly hope that the hops that come out of the pile of apple leaves will have a hint of apple flavor.

Now...we wait until spring, when we select and order our hop rhizomes to plant in each mound. Fun!

Two other quick digressions:

1. I just changed the hummingbird water and this little zippy creature came right along and started sucking it down. Aren't his wings COOL?


It's the same bird from 2 angles and you can really see the iridescence of the feathers.


2. Racer 5 appears to be jealous of the attention that the hummingbird is getting.


The rest of the chickens took the opportunity to sneak in the house, but Bella chased them out.Here is an action shot of them getting chased out!